Slide Show

Showing posts with label Remodel. Show all posts

Playroom Makeover

This post is sadly, one that I forgot about until now! (oops!!)
We actually remodeled this room last year, April of 2015.
I've had this saved as a "draft" until now, so I'm finally getting around to adding the finished photos, and sharing it with you!
So here it is:

Before our playroom was a "playroom", it was a room that we never really used.
Aaron did his workouts in this room, but other than that it really had no specific use...as you can see.

Before Photos:


Before
Before... (the carpet that was on the stairs was different than the
original carpet in the playroom- it was just as nasty though.)

After Photos:


Everything We Did:

-Painted trim & doors white
-Painted/updated door hardware
-Painted walls
-Replaced carpet in playroom & on stairs
-Painted stair skirt board white
-New decor & furnishings

Where Is It From:

-We made the storage/entertainment center ourselves
-I made the Scrabble Tile wall art
-All other wall art is from Hobby Lobby
-Kids table is from Ikea- I ordered it off Amazon for just under $50. I stained it a dark walnut color myself.


Our Kitchen Transformation- HOW I DID IT in 1 weekend!


I will have another kitchen cupboard post, with mostly just photos, once I have the final touches done. For now... these are the photos I will be using... there will still be some blue tape here and there :)

I have dreamt of painting my kitchen cupboards white since we moved in (over 2 years ago).
But the task seemed too daunting, we also weren't sure we wanted to paint over hickory wood- since some people love it (us, not so much). As we updated the rest of our house, we finally came to the conclusion that the hickory cabinets no longer fit the look of our house (not that they ever really did...). They were out of place, and to be honest, driving me crazy.
My husband finally gave me the A-ok to go for it! He was going out of town for a weekend, and taking our 1 year old son, so I would have a full weekend of uninterrupted time to try and get all of this crazy work done!! ...and somehow I managed to do it all in that amount of time! (well, a couple final touches left...but for the most part, I'm done!)

I have to be honest and warn you- this is a HUGE project!
If it wasn't for my husband and son being out of the house for the entire weekend, there was NO way I could have done this in the time frame I was able to! I started taking apart our kitchen on Friday about 1pm, and finished screwing on the last door knob at about 3:30pm on Sunday. I more or less spent every waking minute working on this project.

ANYWAY...

 I wanted to go with a high quality paint, since it will have to hold up to scrubbing, high traffic, and a 1 year old banging and clanging around my kitchen cabinets (not to mention a husband who pretty much does the same thing...).
I bought my primer, paint, and most of my supplies from Sherwin Williams. They were having a 30% off sale (bonus!!).
I highly recommend watching and waiting for their sales! They have sales often, and I have never had to buy paint from them for full price! I also have to say they have the most helpful representatives, they always seem to be quite knowledgeable about the different paints you should use, what tools...etc.
For a project like this, I opted to spend slightly more money, for the highest quality result.
The worker at the store said that using the ProClassic white paint for the cupboards, I would not need a primer if I was going to sand down the cupboards (which I was). He said all I would need is 2 coats of the paint. I opted to still go with the primer. I always use a primer, and wanted to in this case as well. He said if I wanted to use the primer, I would only need 1 coat of primer and 1 coat of paint. 

Here are the specifics of what I used

& exactly how I accomplished this mighty task.


SUPPLIES I USED 

Paint
Type/Color: ProClassic interior acrylic latex, in "Extra White" 
with a semi-gloss finish (they're stock (un-tinted) white color)
Amount: 1 gallon

*This is a self-leveling paint, which means it should dry without any brush or roller marks*
It's the type of paint they recommended for kitchen cupboards.


Primer
Multi-purpose latex primer
Amount: 1 gallon


Other Supplies
I almost always use the tinfoil trick in the roller
tray... that way you're not washing out, or using
numerous trays! Just toss out the used tinfoil!

Ultraflex sandpaper 220 grit(4 pack) -Sherwin Williams
FlockFoam Roller Pad (2 pack) and handle -Sherwin Williams
Mini-Roller Tray -Sherwin Williams
Wagner Flexio 570 Spray Painter
Electric Hand Sander
Painter's Tape
Regular Paint Brush
Tack Cloth


HOW I DID IT ALL

Well, as I said earlier... this was a huge project. I'm going to try and be as specific as possible, and yet keep this as short and to the point as possible!
I'll do my best to try and give you a timeline to all this madness- so you have an idea how long everything took, for your own planning.
So here we go...

I started by taking off the doors, and labeling all of the doors and frames with the corresponding numbers.
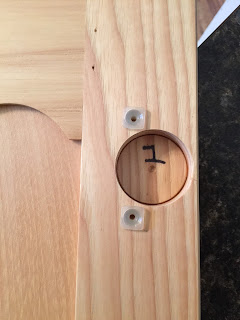
This is the inside of one of my cupboard doors...
I put a piece of masking tape over this number,
since I knew when I painted these, the paint would cover
the number. That way, when I was done painting, I pulled
off the piece of tape, and could see the number ;)


Labeling the frames with the corresponding door numbers just made it that much easier when we put it all back together! TAKE THE TIME TO DO THIS!!! Trust me, I promise it will help. The more organized you are in this project, the less chaotic it all is!

I also put all of the hardware and screws for
EACH cupboard door or drawer, in it's own
bag labeled with the corresponding number.
Did I say how helpful it was to do this in an organized fashion???
SO HELPFUL!!!!!

Once I had all of the doors off, everything labeled and tucked away, I cleaned the frames to get rid of all of the grime that somehow accumulates EVERYWHERE in a kitchen.
 Once everything was clean, I started hand sanding the frames. I used 220 grit sand paper and just sanded the surface until it was dull.
PS- this is MESSY!! You will have dust EVERYWHERE!! Since I left everything in my drawers and cupboards- I covered it all with towels, cloths...etc. When I was done sanding, I used a vacuum to clean all of the sanded surfaces, and all of the dust that accumulated ALL OVER MY KITCHEN! I also went over the sanded surfaces with a tack cloth before priming. YOU DO NOT WANT sanding dust in your new paint!

Once I had the frames sanded, and CLEANED, I used my handy dandy painters taped and taped everywhere I DID NOT want paint (counters, walls, microwave, stove...etc.)

Then I started priming! Using a brush and my flock foam roller I rolled the outside of the frames. I used the roller everywhere I possibly could- in the hard to reach areas (corners, tops of frames, sides of frames, around hinges...etc)  I used the brush.

It took me about 1 hour to do all of the frames. By the time I finished, the area I had first started in was dry enough for a second coat of primer- which I opted to do, even though the guy at Sherwin Williams said I would only need 1 coat of primer...

The flock foam roller is a MUST in my opinion. The picture below is after the 2 coats of primer. I couldn't get over how awesome it looked! It looked like it had been professionally sprayed on!! See for yourself!
Like, WOW!!!
Once I was done with the 2nd coat of primer- it was time to get to work on the cupboard doors!

I cleaned my doors using Honest Company's multi surface cleaner. I opted to use this because this stuff works AMAZING at cleaning off gunk! The toughest, goopiest crap comes off so easy with this cleaner! I really just used this because it's what I had on hand, and I knew it worked good! A few sprays per door, scrub with some paper towel... that's all it took.
And please, don't skip this step! If you leave any gunk on your cabinet doors... it is BOUND to seep through your paint when all is said and done. Take the time to clean them!

Then comes the dreaded sanding.
I say this because it TOOK FOREVER! Basically, I had to sand my cupboard doors down until they were dull. Which resulted in one very sore right arm, and very dirty, dusty clothes. Wear a mask and eye protection...I did this out in the garage. I used my hand sander, which helped, but man was my arm sore!!! I always underestimate how much work sanding is!
(Reminder- I started this whole project Friday at about 1pm. Once I was done sanding the cupboard doors it was about 9:30pm Friday night...I only took about a 1-1/2 hour break for dinner...so plan accordingly. The prep work always takes longer than you expect it to)

Saturday morning about 9:00am, I got back to work.
I vacuumed all of the cupboard doors, and wiped them with a tack cloth.
Then it was time to set up the garage for painting!! (FINALLY!!)
I used a large blue tarp to protect the floor, a couple pieces of old insulation/styrofoam more or less just for added paint protection. Then I set all of the doors/drawers on 1x2s.
SEE BELOW.


With a sprayer- there is ALWAYS some amount of overspray. Make sure everything you don't want paint on, is either OUT OF THE ROOM, or covered. Again- prep always takes the longest, and seems to be the most work!

Then I used my sprayer, and painted the first coat of primer on the BACKS of the cupboard doors.
I let them dry for about 1-2 hours, and they were dry enough for me to flip and start on the other side.
I did the same- 1 sprayed coat of primer on the FRONTS of the cupboard doors.
1 coat of primer on the BACKS of the doors first. Notice my few
practice sprays on the cardboard box BEFORE spraying
on my doors! That's where I make sure all of my settings
are how I want them.

While the fronts dried, I went back to work on the kitchen cupboard FRAMES.
I did the 1 coat of white paint, using the exact same techniques for painting as I did with the primer.

Now it was about 5pm on Saturday. DINNER TIME! 

After a longer dinner break over at my sister's house (which was so amazing, because I never get to slowly enjoy dinners with family anymore, thanks to my 1 year old son...) I got back to work about 8:00pm. My frames were donezo!!! 2 coats of primer, and 1 coat of paint was all it took!

So I got to work on the cupboard doors/drawers. Both sides were now primed, and ready for paint! Using the white paint, I sprayed the FRONTS of the cupboard doors, and let them dry all night.

8:00am Sunday morning
I flipped the doors/drawers over and sprayed the BACKS of the doors with the white paint.

According to the can, it takes 1 hour to dry to the touch, and 4 hours to dry between coats.

After doing the 1 coat of white paint on both sides- I checked them over to see if they needed a 2nd coat of white- and they DID NOT! They were perfect! (Mr. Sherwin Williams man was right!)

I let them dry & cure for about 5 hours before bringing them inside. I was prepared to let them sit for a few days to really harden and cure - but the more I checked them, I really thought they were good enough to be brought back in!

So, with my dad's help (because it's a 2 person job...) we put all of the doors and drawers back on!

I also bought new cupboard and drawer hardware! I bought knobs for the doors, and cup pulls for the drawers, both in oil rubbed bronze off of Amazon.
If you're interested in the hardware I used, click the links below to see exactly what I bought for both:
Knobs
Cup Pulls
PS - these were FAR cheaper on Amazon than I could find them in any other store.

Once we had all of the doors/drawers and new hardware on... we were DONE!!!
This was about 3:30pm on Sunday.
So it was A LOT of work in a short amount of time.
BUT SO WORTH IT!!

Check out the BEFORE and AFTER pictures:

I literally COULD NOT be happier with how the cupboards all turned out! Everything that was rolled looks amazing and has a professional, factory finish! The sprayed doors and drawers also look flawless! See for yourself below!


ONE LAST little thing I did, since I put the cupboards up without giving them days to cure, I put vaseline on all of the rubber stops that were on all of the insides of my doors and drawers. This prevents the paint from sticking and peeling off at all!!! We also have slow-close plungers on all of our cupboard doors, and some of our drawers, these also got the vaseline trick! 
Just enough vaseline to cover them, to prevent any sticking!

VOILA!

As I said before...
In my final Kitchen Remodel post I will have more, truly FINISHED photos!
(minus the blue tape!)

Hopefully this helps some of you who are interested in painting your own cupboards!!
 It's a big project- but it's the cheapest way to TOTALLY TRANSFORM your kitchen!


White Trim Transformation!


Wow. What a project.
I knew it would be a lot of work- and was it ever!
I also knew I would love the end result- but I don't think I realized how MUCH I would love it!

A couple gallons of white paint has literally transformed the entire look and feel of our upstairs!


Here's a quick break down of 
HOW I DID IT:
I started with the trim and door frames, then I painted the doors.

For the Trim:
I decided to paint the trim in place on the walls. In my opinion- after doing it both on and off the walls- I MUCH prefer painting the trim ON the walls.
I tape off basically anywhere I don't want white paint: so above the trim to protect the painted wall and below the trim to protect the floor. I never totally trust painters tape- so I always plan on going back afterwords and doing touch ups anywhere the white paint has seeped under the tape.
Since I was painting over lighter colored trim I used 2 thin coats of primer- making sure it was fully dry between coats.
Then I painted 3 coats of white paint, again making sure the paint was dry between coats (following the dry times according to the can).
This is the white paint that I use.
Even though it says "paint & primer in one"...I always
choose to use an actual primer before painting still. Call me old school I guess.
Once my trim was beautiful and dry, it was finally my favorite part of any painting process:
RIPPING OFF THE BLUE TAPE!!!
I always use a box cutter to cut the tape first- so it peels off nicely without peeling away any new paint.

Now Onto Doors:

The doors...the hard part...but also probably the most rewarding part.
So here's how I did it...
We removed all of the doors and the hardware.
I opted to do all of the work out at my parent's house in my Dad's shed. Set up is always the most tedious part, so I was super glad to have my Dad's help! Here was our handy-dandy set up:
He had small wooden blocks holding the doors up off of the ground. He also had the doors braced to the wall (nailed at the top with small nails)- so I could work on both sides of the doors- which DRAMATICALLY cut down the time this project took. Otherwise I would have spent far too long waiting for each side to dry before working on the other. Did I already mention how glad I was to have my Dad helping me...?
Once we had all of the doors in place- it was time to sand. I used my electric hand sander and medium grit sand paper to rough up the doors. It didn't take long- a couple passes on each side of the door and that was enough (thank God because you don't ever realize how much work sanding is until you've been working at it for an hour...hello newly toned arms).

After what seemed like forever- I was finally done with the sanding. I used the brush accessory on the vacuum and vacuumed the doors REALLY good. I also went over them with a clean cloth to make sure there was no left over sanding dust! 
Then it was time to paint!! 

I was finally going to get to use my Wagner Flexio 570 spray painter!! EEEEEEKKKKK!
 I was so excited! 
Again, I was glad to have my Dad helping me because there are a lot of controls and settings...
We practiced with the primer on an old scrap piece of wood before we moved to the doors.
My dad did all of the priming, and I did all of the white paint.
1 coat of primer was all that it needed!
We primed sometime late afternoon and ended up letting them dry over night. The following morning right away I got to work on the white paint.
According to the can of white paint, it needs a minimum of 4 hours to dry between coats. So once it had been 4 hours, I got to work on the second coat. 

With the Wagner sprayer it saved SO much time! It covered the doors flawlessly (once we got the hang of it, which didn't take long). 
After each coat we made sure to take EVERYTHING apart on the sprayer and really wash it good! So in my opinion- even with the added clean up, using the sprayer was MORE THAN WORTH IT!!!

NOW.... with the paint sprayer- there was a lot of overspray. You can definitely change that with the settings you use- but we were most happy with the finish that just happened to result in the most amount of overspray. THAT, is why I ended up donning one of my Dad's old work shirts to cover my arms and chest, his old work hat to keep my hair from turning white, and of course a make shift mask over my face. My legs were definitely speckled white, and my black flip flops now have a speckled white finish to them. Good thing they were about $2 from Old Navy. 
So long story short- if you're going to use a paint sprayer- there will be overspray. Dress accordingly and cover any surrounding areas you don't want painted!!! 
These pictures are after the 2 coats of white paint


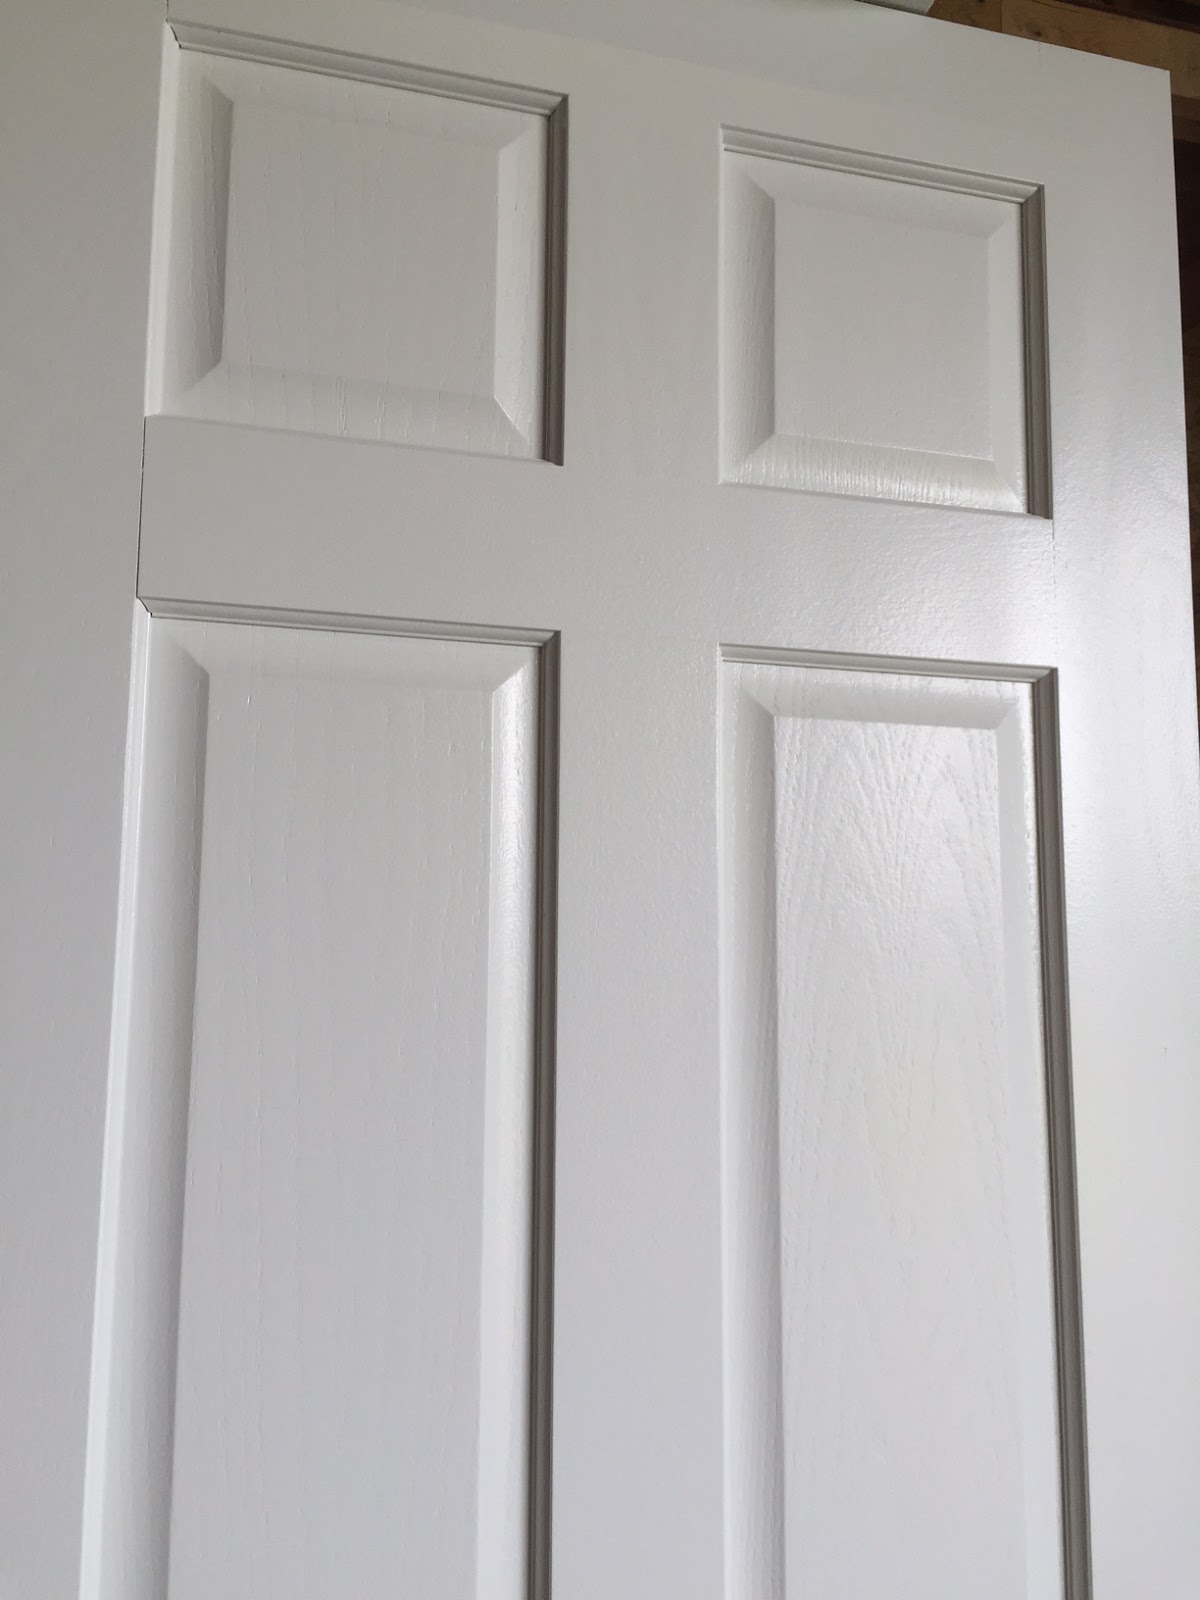
The sprayer gave us such a flawless, factory finish. We absolutely LOVE how they turned out!

I also spray painted all of the ugly, old, shiny brass hardware... as well as all of the screws for the hinges and door knobs. THE ONLY hardware I am buying new are the door strike plates- I figure with the constant use of the doors, the spray paint would get worn on those FAST. I ordered them from Home Depot- with 2 each in a pack, for about $2.60/pack. Well worth it in my book.


I used Rustoleums Oil Rubbed Bronze on the hardware. I did 3 coats of the oil rubbed bronze- making sure to follow the dry times between coats. I then finished them off with a clear coat protective enamel in a glossy finish to make sure they withstand the tests of time (hopefully, anyway). It helped to be able to stand the handles upright in an old piece of styrofoam... that way I could get the handles at all angles.

Once the doors were all painted we left them for a couple days to dry and cure. I really want this paint to hold up, so I figured the longer they can cure before being used- the better!

This project took a lot of time, but we are SO happy with the end result! 
It gave our home an entirely different feel, totally updated it...
and we love it!!

Gavin's Dresser Remodel


This is a project I've been dying to do for quite awhile! As in...since I was pregnant with Gavin. 
I wanted to find a good ol', solid wood dresser- and fix it up.
The problem was- I couldn't find a dresser that I liked.
We searched everywhere too- Craigslist, thrift stores, GoodWill...etc. No luck.
Since Gavin's due date was quickly approaching, we ended up buying a super cheap dresser from Target (I think it was Target??), yes, it even has plastic handles. CHEAP.
We figured it would get the job done until we found a nice dresser we liked (and it has).

Finally, Spring, otherwise known as Thrift sale season, rolled around and we were crossing our fingers for a nice, solid, wood dresser for cheap!

What do ya know, we finally found one!!!
$40.

Based off the tag on the back- it's a dresser built sometime pre-1950's! So it's a good ol', real wood, sturdy dresser!!
It needed a lot of TLC, but that's just what I was looking for! 
I was truly, pathetically excited to give this old dresser new life!
It had a lot of scratches... all over... everywhere. 
The top of the dresser had some chipping
on the edge, as you can see in this picture

Decently deep scratches... EVERYWHERE.

I wasn't worried about the scratches- they're nothing a little A LOT of sanding can't take care of!

And that's what I started with. A LOT of sanding.

 I took out all of the drawers, took off all of the drawer knobs, and got to work sanding...

I used my electric sander and 100 grit sand paper, and sanded the crap out this dresser.
I did not want ONE scratch left over.
(I wanted this dresser to look brand-spankin' new for my little boy!)
Buh-Bye scratches!!! Hello gorgeous, fresh, smooth wood!!
I sanded until I was all the way through the old lacquer and finish, until I was down to the fresh wood. Some scratches were deep enough that I had to sand them down quite a bit to get them to disappear. But let me tell you- there is not ONE scratch left on that dresser! 

My arms were so sore, and I sanded long enough that when I would turn the sander off to go do something else for a minute- my hands felt like they were still vibrating from the sander.
It's a LOT of sanding. But worth it, because it looked brand new!

In these next photos I wanted to show how amazing the wood looked after I sanded out all of the scratches and surface stains!
(...and that's just ONE little corner...it looked amazing)

So here it is after all the sanding was done.
I also sanded all of the dresser drawer fronts.
(I didn't paint the insides of the drawers- because they're a very nice looking wood- so that was an added plus, and saved me a lot of work!)


Now it was time to prime!!
I decided I wanted to paint everything except the very top of the dresser- I wanted to stain the top a nice, dark walnut color.

I used painters tape and newspaper and covered the top of the dresser to make sure no paint got on the wood that I would be staining later.

I rarely use spray paint to paint furniture- but I guess I had a wild hair, and decided to give it a try! 
Why not right?!
I really just wanted to try it and see if I liked spray painting furniture better than painting with a brush...
Which I do have to say, I might like spray painting better. 
The finish is flawless- if you take your time and do it right.
It's also way easier than trying to use a brush and get in all of the corners, cracks...etc.

Anyways...

I used Rustoleum's spray primer.
I did 2 coats- which it said you can do a second coat as soon as the first coat dries- so pretty much right away (which was really nice!).
I used a total of 3 spray cans of primer for the dresser and the drawer fronts.
(sorry, no pictures of priming because priming is boring and I guess I didn't think to take any...)

NOW THE FUN PART!!! 
PAINTING!!!!
I used Rustoleom's Heirloom White...a very nice, off-white color.

This was my fancy workspace for the drawers...
yup, out in the yard.
I did 3 coats of Heirloom White. 
In between coats, if there were any rough spots I noticed once it dried, I would take fine/finishing sand paper and sand it smooth...I also made sure to wipe the dresser and drawers down every time with a clean, dry cloth to make sure the surface was as clean, and smooth as possible!

What about the drawer knobs??
I opted for just painting the original drawer knobs with my Rustoleum Oil Rubbed Bronze spray paint, instead of buying all new ones.
I did 4 coats of spray paint (following the dry time instructions from the can), then finished them off with 1 coat of "crystal clear" Rustoleum Polyurethane spray just for some added protection.
You would never know that these were the original WOOD knobs!


THEN IT WAS THE SUPER FUN PART....
THE STAIN!!

I used Rustoleum wood stain (from Michaels) in Dark Walnut.
I only did one coat- because I loved the color.
If you want a darker color- you can do more than one coat of stain.
This was my first time staining anything! I was so nervous- but I quickly realized it's the easiest thing in the world. 
Wipe on.
Wipe off.
Repeat...a lot of times, until you're done.
There it is all painted and stained!! Only a few more things
left to do!
I used Rustoleum polyurethane spray, "gloss" finish, to seal and finish the top where I stained. 
I used two coats. 
(I did cover the painted part of dresser with newspaper when I did the poly)

I also took off the wheels from the very bottom, and put felt pads in their place (since Gavin has a wood floor in his room).

I let the dresser cure for a few days before bringing it home...

Now that we've finally brought it home, and all is said and done...
it looks like this...


I am so happy his dresser turned out as AMAZING as it did!!
This was my first real furniture remodel, my first time using spray paint on furniture, and my first time staining anything! 
So the fact that it all turned out BETTER than I expected- made me quite happy. 
:)

It was so much fun taking an old, beaten up dresser that someone was getting rid of for 40 bucks,
and turning it into what's now, the focal point of Gavin's room. 
It's gorgeous! 

If you're curious, here's the cost break down:

Dresser: $40.00
Spray Paint: $15 (about)
Stain: $5 (about)
A Grand Total of $60!!! 

Living/Kitchen/Dining Room Makeover Sneak Peak!

So I mentioned (what seems like forever ago) that we had a lot going on this Spring! 
And wow, have we been busy!!!!
We replaced our roof, air conditioner, furnace, and water heater all within about a week or two!
And now I'm finally about done with my living/kitchen/dining room makeover!

It's taking me longer than I thought (surprise,surprise) but, we're finally SO close to being done!!!
I wanted to share some pictures because we're so excited we're almost done with it!!

Here's everything we've done in this makeover project:

Tore out living room carpet, replaced with laminate wood
Ripped out old fireplace to open up our living room more
Changed up living room layout
Repainted living room, kitchen, and dining room
....and last but definitely not least....
Repainted all trim white (what a freaking project that is in ITSELF!)

Ok, so here are some sneak peak pictures!
Dining room window BEFORE....Aaron hates
painting, but he was willing to help me prep for
painting ;)
Dining room window AFTER!!!
Loving this white trim!!!
And a "makeover" wouldn't be complete without
some new decor!

Flooring and living room rug
I'm going to try using these old closet doors
as a fun new decor piece!
(we'll see if I like
it...)

We are definitely in the home stretch now! 
We just have a little bit of painting left!
We're getting close (thank God)!!


Post Signature

Post Signature