Slide Show

PREGNANCY - 25 weeks with baby #2


How far along: 25 weeks

Baby's name: starts with a J ;)

Gender: BOY

Best moment this week: We had Gavin's birthday party last weekend - which was so fun! He was crabby for about the first half of it... "it's my party and I'll cry if I want to" seemed to be his theme song for the day! Oh well, he can get away with that for a little while yet. ;) It was still a super fun day, and once presents came into the picture he was happy as could be! It was also fun to have the family over so they could all see our new house, which we're almost totally settled into!

Movement: Little man is a mover in there! I love it! I have a feeling he will be as active as his big brother is...

Miss Anything: Sleeping on my stomach. I really, really, really miss that... :( And when I roll over in bed to see Aaron peacefully sleeping on his stomach, I miss it even more!

Looking forward to: A long over due, RELAXING weekend!!! yay! Not even going to let myself do any of the projects I want to!!! (a diy shiplap headboard, fall wood decor....sounds so enticing, but forcing myself to just lay low and relax!)
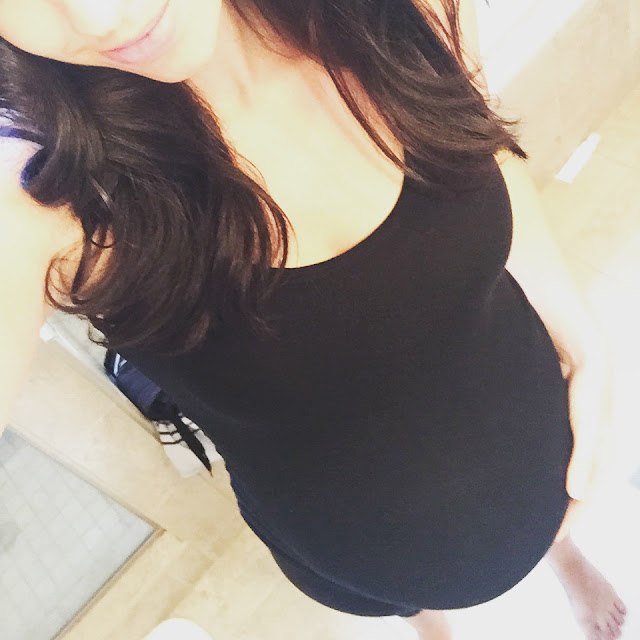
I had to throw this pic in here from today also...
this bump is just getting crazy! I can't believe I have another 15 weeks of growing this baby yet to do.... (um yikes)
....and in other exciting news, today I finally got a hair cut after over a year and a half without one! YIKES!
hashtag momlife.

PREGNANCY - 24 weeks with baby #2


How far along: 24 weeks

Baby's name: We finally decided on a name! BUT... we're keeping it a secret until he's born :) Hint, it starts with a "J".

Gender: BOY

Best moment this week: Working on the nursery! I love being able to watch the room slowly come together! It's also a huge plus to be done with the painting and onto the fun stuff like picking furniture and decor!!

Cravings: anything healthy. I think my sweet tooth kind of over ruled me for awhile these past few weeks, so recently I've really been craving healthy foods, and less sugar. It's a miracle!

Movement: This little boy has really picked up the pace in there. He moves around SO much! Every night he usually gets a little crazy in there, and I love it!

Miss Anything: I really miss having a not-sore back! My low back has really been bothering me, I think I just overdid it with the move about a  month ago, because since then my poor back has been really sore. Even having a chiropractor for a husband only does so much when you're pregnant :/ I've also reached the point where my belly makes it slightly more difficult to paint my toenails, and shave my legs. Yay pregnancy...

Looking forward to: Our doctor appointment this week! For no reason in particular, I just love going to the baby appointments! I love hearing that little heartbeat :)
I'm also really hoping for a boost in energy...that would be just fantastic since the past few days I have felt like I'm literally just dragging myself around to do anything. I sleep like a rock (for the most part) at night, but wake up feeling tired, and continue feeling that way throughout the day until I go to bed. Ugh! Baby must really be growing, because he's stealing all of his mamas energy!!


Gavin's 2nd Birthday

My little boy is turning 2 in a couple days...
(enter sappy mom post...)

I honestly can't believe my sweet baby boy is 2 years old.
I can remember the day he was born like it happened yesterday.
Everything about it.
Everything from (finally) being in labor, the delivery, and then that awesome, miraculous moment I first laid eyes on him and snuggled him on my chest.
Heavenly.
I honestly think every now and then we have little bits of heaven here on Earth...little glimpses as to  what pure bliss feels like...and finally holding your newborn baby for the first time is most definitely one of them.

Now, somehow 2 years later, here we are with a little boy who runs around like a wild man all day, gives the sweetest kisses, and still manages to melt and steal my heart every single day.


I think I've just given into the fact that I will NEVER understand how time can possibly fly by so fast.

I've also given into the fact that this little 2 year old boy has taught me more about myself than anyone else has so far in my life.
Most importantly, he's taught me that love at first sight absolutely does exist,
and that though not all days are easy, every single day is a blessing and should never be taken for granted.

At 2 years old my sweet little Gavin loves:

to swim- he's an absolute little fish in the water
going for 4-wheeler rides
playing in dirt (of course)
anything to do with trucks, tractors, motorcycles
"mowing" the yard with his little mower
picking on Harley
his blankie :)
and so, so much more!!

I spend every day, all day with this little guy, and I would not trade that for the world.
Watching him grow and learn about this big world around him,
is such a blessing.
I honestly thank God every day for blessing me with this little sweet heart.

Happy Birthday Sweet Boy!!!!!
Mama loves you more than you will ever know!


DIY Giant Magnetic Chalkboard

DIY Giant Magnetic Framed Chalkboard

I have been DYING to do this project!

I've seen so many cool, BIG chalkboards.
Some people have them painted right onto their walls, which I considered doing, but our walls are pretty textured, and I didn't want to sand them down, because, well then that's a non-textured, chalkboard chunk of wall forever... unless you repaint, retexture... and you get the picture.

I wanted a giant chalkboard I could move if I wanted, and I wanted it to be magnetic.
So... since I didn't find any tutorials with what I wanted...
I do like I normally do, and come up with my own little plan for exactly what I want.

This time, it was a 3'x5' magnetic chalkboard, made out of galvanized sheet metal.
I had plenty of sheet metal at my disposal, since my dad owns a heating and cooling business.

So here's exactly how I pulled this little big project together:

I started by picking the size: 3'x5'.

So I got my sheet metal, cut it to size, and folded all the edges in/under 1/2", to provide stability. Otherwise this thin sheet metal will wobble and kink, and once you get a kink or wrinkle in it, there's no getting that out. Folding the edges doesn't totally fix this possible problem, so you still need to be careful when handling the sheet metal, but it does help a lot with strengthening the sheet.

Then it was time to paint! (I used Rust-Oleum's chalkboard paint)
I did 3 coats of chalkboard paint, following the dry times between coats.

For the frame I used 1x4 pine boards.
I love using pine for accent pieces, I used pine for my DIY Floating Shelf too. I just love the character it has, with the knots and the grain of the wood. You also can't beat the price.
I wanted the top and bottom boards to overlap a little, as you can see.
You can really frame your chalkboard however you want.

I stained the pine with 1 coat of Minwax walnut stain, and finished it off with 3 coats of the Minwax poly.

Once my 3rd coat of chalkboard paint was dry on the sheet metal, we got to work on figuring out how to attach this thing to the pine boards!!

We opted on using some super strength glue, as well as 1/2" screws to make sure the sheet metal was secure, and not bendy once up on the wall. So we glued all the edges on the back (unpainted side) of the sheet metal, to the back (unstained side) of the pine boards, then secured it with the 1/2" screws.
(this way all of the screws are hidden, and are on the backside of your frame)
THIS... getting those screws through the metal, was quite a job. Good thing I had my husband Aaron :) This was his job. It was not easy...

In the photo above you can see how we attached the sheet metal/chalkboard onto the backside of the frame.
In this photo above you can see our 1/2" screw into the sheet metal, and the frame.
Once we had the sheet metal all attached to the frame, it was time to screw it onto the wall! We marked where we had studs, and screwed the chalkboard into the studs using deck screws.

If you don't have studs where you're hanging your chalkboard, you will want to use anchors.

The screws we used to hang the chalkboard on the wall were silver, and stood out against the dark stained trim frame. So I used some of my left over Oil Rubbed Bronze Rust-Oleum spray paint, and with a q-tip, just painted the screw heads so they blend in with the dark wood! 

One the chalkboard was all snug to the wall, we were mostly done!!

I let the chalkboard cure for 7 days actually... which normally would have been torture for me to wait so long, but working on the baby's room throughout the week kept me distracted! Check out a sneak peak of his nursery here by the way! 

After the 7 long days of curing, I "primed" the chalkboard.
This just consists of covering your brand new chalkboard in chalk, then rubbing it in with a dry cloth, and then just cleaning it off with a damp rag.
Since chalkboards are porous, if you skip this step, your first few drawings will more than likely end up being pretty much permanent... and you don't want that!
I went through a few pieces of chalk priming my board, since it's a BIG friggin' chalkboard!
BUT THIS IS A "DO NOT SKIP" STEP!!

Once I had it all covered, I rubbed the chalk in good with a dry, clean cloth, then just wiped it all off with some damp paper towels, and VOILA!!! 

Ready to ROCK & ROLL with this baby! 

I LOVE it! 
I can't wait to get some fun magnets for the kiddos to play with on this chalkboard too!


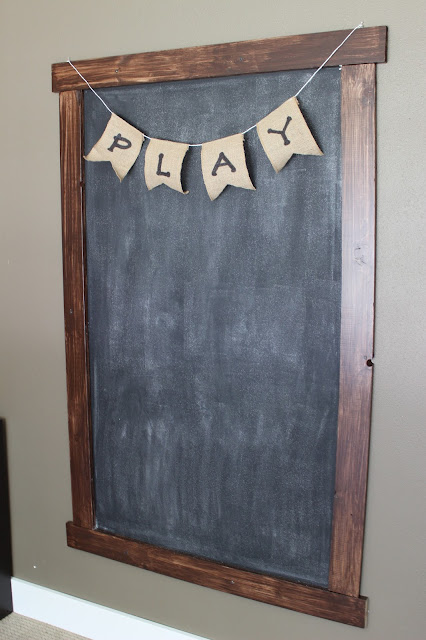
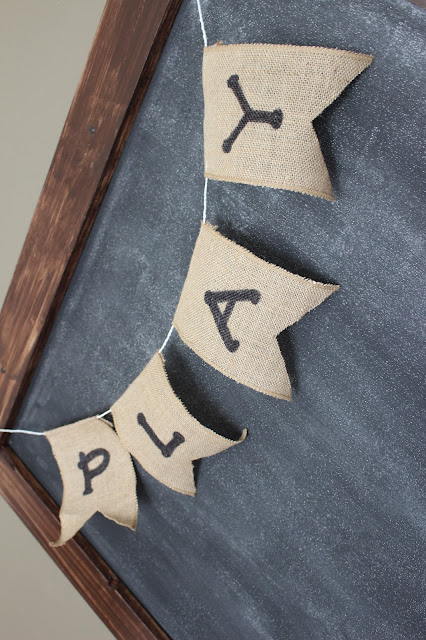
I also decided to make a cute burlap "play" banner.  
I have a similar burlap banner on my floating shelf that I love, as well as the burlap banner I made last year for Gavin's birthday... tutorial for these banners is here by the way! 
These banners are SO easy to make, it literally took me a total of 15 minutes!
I think it gave the chalkboard its very last, finishing touch!

:)

This chalkboard was a super fun project to do, and it really wasn't all that hard either! 
It's now one of my favorite things about our house!!

Baby J's Nursery Sneak Peak

Well first and foremost, our baby boy #2 finally has a name!! 
It took us awhile to decide on a boys name, we had a couple that we kept going back and forth between.
Then we finally had the right combination of first & middle name- and it was like BAM- that's his name! So we knew! 
We've decided to keep it a secret until he's born, which is what we did with Gavin also.
BUT, it does start with "J" ;) So from here on out I'll most likely be referring to him as 
Baby J.
:)

I really just started to get to work on his nursery this weekend. Aaron and Gavin went out of town for the weekend, which meant this mama FINALLY got to do some projects around the house that desperately needed to be done! 

With the help of my mom, we started, and pretty much finished painting his nursery.
We also took a glorious trip to hobby lobby...which is always WAY too much fun for me...
So I got almost all of the decor I need for Baby J's room, as well as this super cute decor I just added to my living room...
Hobby Lobby is SO AWESOME!!!

Back to nursery fun though-
I'm going for a rustic, woodland, adventurer feel.
I can't use the word theme, because I never have one "theme"...
I painted the walls a light gray, called Gray Matters from Sherwin Williams, I LOVE IT.

So, here's a little sneak peak into little Baby J's nursery


I can't wait to continue working on his little room!
Working on a baby's room is one of my absolute favorite things to do!
I can't wait to start bringing in furniture, bedding, ...etc.!

So much to look forward to!

PREGNANCY - 23 weeks with baby #2


How far along: 23 weeks

Baby's name: We finally decided on a name! BUT... we're keeping it a secret until he's born :)

Gender: BOY

Best moment this week: I finished a project I've been dying to do........ that I'll be sharing a tutorial post for soon!!!... It's a giant, 3'x5' magnetic chalkboard in our playroom! I didn't have a tutorial to follow, since I had entirely my own idea on what to use and how to do it. I was nervous how it would turn out, but it is AWESOME! I'm so happy with it, and it's finished and curing as we speak! SO HAPPY! I can't wait to share it with you!

Cravings: still just banana pancakes...

Miss Anything: Red's Apple Ale. We had some family over for a mini-swim party, and I really missed being able to sit outside in the sun and enjoy a Reds, like everybody else. #boo. I also miss having swimsuit bottoms that actually fit..... 

Looking forward to: Aaron is taking Gavin home to his parent's for the weekend, and I'm staying home to finish the million little things we still need to get done from the move! I'm also going to have a girls weekend with my sister and mom, who will help me with all my little projects - one of them being painting the baby's room!!! YAY! So I'm actually excited for a lot this weekend, it will be a super productive weekend, but also fun since I get to spend quality time with my mom and sister! yayy!!

DIY Barnwood Towel Hanger

DIY barn wood towel hanger
Comin at ya with a super easy, and cheap DIY project!

I have about 1,000,004 little, crafty, decor projects I want to do in this house...
and this was one of them!

We didn't have any sort of hand towel hanger in our bathroom, which was not going to work for me. 
I couldn't stand leaving our hand towel in a bunched up pile on our countertop any longer!!! 
So today, I finally took the 30 minutes of time it required, and came up with my handy little DIY towel hanger!

So, here's what I did:

Here are the few things you'll need:

The hose clamp you can get from a local hardware store.
The hook/hanger I just got from Target.
The glass bottle I got for a couple of dollars from Michaels.

We have a pile of old barn wood out in our garage, so I went and grabbed a piece. 
Cut it to the size I wanted, and sanded it down... not totally smooth, but basically just getting rid of any splinters and real rough edges.

Next, I figured out exactly where I wanted my towel hook, and the bottle. Once I had that figured out, I screwed my towel hook into the board. 

The hose clamp and the glass bottle are slightly trickier. We used a small screw (1/2" long) to attach the hose clamp to the board. We pre-drilled a small hole into the hose clamp, then by hand, just screwed the 1/2" screw through that hole, and into the board. The hardest part was just getting the hole into the metal hose clamp (all in all, not too tricky). Once the hose clamp was attached to the board, I just tightened the clamp around the top of the bottle, until it was secure.

Then all that's left is to hang it where you want it!

VOILA!


Pregnancy - 22 weeks with baby #2


How far along: 22 weeks

Gender: BOY

Sleep: Sleeping really well! As long as I have my pillow between the legs! Makes such a difference with helping me get a good night's sleep!

Best moment this week: I started painting little baby boy's room!! (photos to come) I am SO excited to get his nursery put together!

Worst moment this week: We're closing on our old house this Friday, the 5th! Which is SO bittersweet... but it's been SO busy with getting everything out of there (all the little things we left behind from the "big" move a couple weeks ago) and then with doing a final cleaning... I feel like I'm about 9 months pregnant. HOLY low back pain and round ligament pain... This mama needs more relax-on-the-couch-time!!!!

Cravings: Banana Pancakes (guys, the seriousness of this craving is so bad... I want these every morning!!!!!!!!! ahhhhhhhh!)

Miss Anything: Wine. Reds Apple Ale. The amount of wine and Reds that would have been consumed by myself in this past month is a scary thought... after all of our crazy, hectic, sweaty, busy, run around, do this, do that, go back to finish this, then that... what I would give to finally come home at night, plop on the couch, and guzzle an overflowing bottle glass of wine... So maybe it's a good thing I'm pregnant and can't drink....

Looking forward to: Closing on our house and being done with all the crazy back and forth work between old house / new house. I'm also looking forward to getting back to work on the nursery... once my poor pregnant body is back into "get er done work mode"... which may be awhile...

goodbye old - hello new


Well to be honest I expected the process of selling our first house to be a bittersweet one - and wow, was I right.

This was the home Aaron and I first bought, only one month after being married. So it was our beginning to everything- homeownership (and everything that comes along with that), marriage, living together, and bringing home our first baby!

It was a spaciously cozy (if that makes any sense) 3 bedroom, 3 bath house that when we first bought it, needed some serious updating and TLC. Which was perfect for me! I spent hours days months years slowly updating, and bringing back to life each room of that house. From new paint, to new floor, to painting the trim white, painting the kitchen cabinets white, updating fixtures, landscaping... making it... well, home. And wow, what a home it was!!!!

That house has become such a part of me... I can literally say I have blood, sweat and tears put into that sweet home (blood part comes from ripping up carpet and taking a tack strip under the fingernail...ow)!! But as much as we've done to this house, TOTALLY changing the entire look and even feel of the home, it's the memories that are the hardest to let go of.

Maybe let go isn't the right word, because I'm not losing the memories like I am the house, but it's these specific memories that get me all teary eyed without fail every time I replay them in my mind:

Moving into a brand new house as a newlywed couple

Pushing our couches together in that living room for an all-nighter-movie-night! (this was clearly before children became a part of our lives....)

Working until the wee hours of the morning on my sweet baby's nursery

Bringing my first born son home to that cozy little living room full of baby swings, blankets, and diapers

Gavin crawling for the first time in that basement playroom

Gavin taking his first steps in that living room

(I shouldn't be writing this post while being hormonal and pregnant, cue the tears)

Gavin's nightly baths from a newborn to a nearly 2 year old, in that tiny, cramped, upstairs bathroom

Playing "chase" with Gavin down that hallway

Watching Gavin run, play, and dig up all kinds of dirt in that backyard

Getting my second positive pregnancy test for baby boy #2... and celebrating in that tiny, cramped, upstairs bathroom!

And I could literally go on forever... with sweet moments of time that are perfectly frozen, right there within those walls. 

I've had to take numerous trips back to that house to finish packing things up, cleaning, etc. and I always find myself getting overwhelmed with memories and emotions, and of course that always ends in a few (maybe a few hundred) shed tears. 

I remind myself we have this new, beautiful home, that we plan to grow into, to fill up with wild and crazy boys...maybe a girl someday if I'm lucky, and make new memories in. 

Our old home is being passed onto a super great family and I just pray the house brings them as much love, laughter, and joy as it did my sweet family. 

that living room

that tiny, cramped, upstairs bath

that downstairs playroom

and this sweet baby's room, the little room I'll miss the most
I will always love, cherish, and miss our sweet first home. 

Post Signature

Post Signature