Slide Show

Bathroom Remodel

From Blahhh to Ahhh :)


So I absolutely LOVE white trim. I think it looks so crisp & clean...and it obviously works with any paint color. When we moved in to our house- no white trim. Not in one room :( I painted all the trim in Gavin's room white- and we just couldn't believe what a difference it made! We loved it! 
(It's my goal to paint all of our trim white in our house, room by room!
So one day while I was home alone (also about 26 weeks pregnant), I decided I wanted to paint our bathroom trim and cabinet white! I had wanted to for so long, and I finally just decided to do it! It was a beautiful day outside- which was perfect! I could open the windows while I worked in the bathroom (to play it extra safe since I was pregnant, I still wore a little mask) and I could take the cabinet doors and paint them right outside in the sunshine on our deck! 

Here are some "before" pictures:


It was so simple! I decided to leave all the trim right in place on the walls, and like always I started by giving everything a super good sanding! The cabinet doors and drawers I took outside and sanded. Then, all I did was use some painters tape and taped around the trim (on the floor and on the wall...for my future projects, I will take some "during" pictures so you can see exactly how I did it). Basically, wherever I didn't want to get white paint, there was blue painters tape! :)

Using just a regular medium sized paint brush, I primed everything, and only used one coat of primer (since the wood was all lighter in color, I didn't need to use more than one coat of primer). Once the primer was dry, I gave everything about 3 coats of white paint (in between coats I would make sure the paint was good & dry).  The trim and the cabinet base were super easy and fast to paint- what took the longest amount of time were the cabinet doors & drawers..I was careful to make sure there weren't a ton of brush strokes all over it, and I made sure I painted with the grain of the wood!

I actually managed to do this all in one day... but it was an ENTIRE day of painting! ...needless to say...I spent literally the next week incredibly sore. Being pregnant, and having to contort my body in strange angles to paint all of the trim around the floor (behind the toilet, and areas under the cabinet...ugh) took a toll on my pregnant body! But, it was worth it!  

Here are the "after" pictures!


So now with Gavin's room done, and our one bathroom done... I only have about 7 other rooms to paint the trim white!!! ...oh boy! 
(that means plenty more remodel blog posts to come!)


How We Got Our Baby To Sleep Through The Night By *6 Weeks Old*!


Nothing beats the first time that your baby sleeps through the night!! ..and the sooner, the better! 
8+ hours of uninterrupted sleep, with a 6 week old baby.... glorious! Here's how we did it!

Gavin was pretty easy on us and was an amazing sleeper! Every night since the day he was born, he would at least have a 5 hour stretch between feedings! During the nights he would pretty much wake up, eat, and go right back to sleep. Although, usually it was more like wake up, eat, and fall asleep while still eating (kid likes his sleep just like his mommy & daddy!).
But, even though he was naturally a good sleeper, there's still a lot that we did to make sure that his love for sleeping didn't change ;)

Here's how we had our baby boy sleeping through the night by a sweet, 6 weeks old!!

Cluster Feeding
Night Feed in a Dimly Lit Room
Diaper Change
Right Back to Bed

Read more about how we did each below.

CLUSTER FEEDING

The one thing I swear by, and I honestly think really helped us get more sleep during the nights, was cluster feeding!! It was recommended to me by some other mama's, and in one of my baby books (Tracy Hogg's, "The Baby Whisperer Solves All Your Problems") she uses the cluster feeding approach as well.
So what is cluster feeding? 
Pretty much exactly that. You feed them in clusters in the evenings leading up to bedtime. Essentially, you are just trying to "tank" them up, so they will sleep a longer stretch for you at night.  One of the best things I took out of one of my baby books was this idea: Babies need a certain amount of calories per 24 hours- they don't care if they get them during the day or the night! That is so true, the baby could care less if they wake up at midnight, 2, 4 and 6 am every night to eat... but we, the parents, CARE! The more your baby gets during the daytime, the less they need during the night! We were extremely lucky with Gavin, and since day 1 he would always have at least about a 5 hour stretch between feedings every night. BUT, I also started from the get go, with cluster feeding him at night. If he was going 3 hours between every feeding during the day, then his last few feedings in the evening would be only 2 hours apart.  So here's a sample schedule with cluster feeding: 
8am - Feed
11am - Feed
2pm - Feed
5pm - Feed
7pm - Feed
9pm - Feed & BED!
For Gavin, by 6 weeks he was having his last feeding around 9pm, we would lay him down right after that, and he would sleep until about 5am! 8 GLORIOUS hours of sleep!! We would feed him at 5am, and he would go right back to sleep for another couple hours! (and so would we!
*I highly recommend looking into cluster feeding, and trying it out!

Night Feed in a Dimly Lit Room

Before Gavin was sleeping through the night, for his night time feedings I would feed him right in our bed, with the bedroom as dark as possible! All we would do is turn on our hallway light right outside of our bedroom, and crack our door just enough so that I could see to feed him (I always fed him right in our bed, and he slept in his bassinet right beside our bed). If it's too light in your room, baby gets distracted looking at all of the cool things in the room and then decides they'd rather just stay awake instead of go back to sleep (no thank you!).

Diaper Change

As soon as I was done feeding Gavin- we changed his diaper (what baby wants to go back to sleep in a wet diaper..??). For some babies, getting their diaper changed (and getting their little butt wiped with a cold wipe) wakes them up too much, but for us it never seemed to cause a problem. 

Right Back to Bed!

After Gavin was in a nice clean diaper, we swaddled him back up, and laid him right back down! Half the time he was already back to sleep (a lot of times he would sleep right through his diaper change even!) but if he was awake, we still just laid him down in his bassinet. The majority of the time he would fall back to sleep all on his own. If he would start to fuss, and wasn't showing any signs of going back to sleep..we would go rock him for a little while, and that usually did the trick :)
(rocking a baby at 3 am, is somehow just as precious as any other time during the day!)

Hopefully this helps you!!! It worked for us, but every sweet baby is different!
:)

Winter Photos with Gavin Man :)

It's Always Fun Taking Pictures With This Little Cutie

My mom and I always have fun taking pictures of little Gavin Man.  
Photo credit goes out to my wonderful Mom :)


Cranberry Cream Cheese Chicken

Cranberry Cream Cheese Grilled Chicken with Broccoli & Quinoa Brown Rice

Healthy, Simple, and FAST Recipe!


Ok this is one of our absolute FAVORITES!! Why?  Because it's super easy, super fast, and oh so good for you!  

Being a new mama, it's key for Aaron and I to have some fast and simple recipes, that we can make, eat, and be done with in time for Gavin's bath time at 7:15.  This is a recipe, that in total takes ... Oh maybe 20 minutes!  

We use all organic ingredients.  The chicken is cage-free, farm fresh.  

So here's what you need:

-Chicken breast (however many you need)
-Organic cream cheese
-Organic dried cranberries
-Organic broccoli
-Quinoa & Brown Rice

Directions: 

Grill the chicken.
While your chicken is on the grill, start making the quinoa brown rice (this time we chose to just try one from a bag. It's already pre-seasoned... and it was delicious! See exactly what we used below)  It's super fast- we just warmed it up in a pot on the stove--- took all of maybe 10 minutes!

Chop up your broccoli into bite size pieces (for this recipe we don't use the stems at all- in one of our other broccoli recipes we do! I'll share that one at some point!) We just steamed our broccoli- which takes only about 5-10 minutes!

Once the chicken is done, we top it with a little slice of cream cheese, and cover it with some dried cranberries! Over our steamed broccoli we put a little bit of butter- (we use organic unsalted) and we use a little bit of salt (we use sea salt)... those are the finishing touches! That's it! Super easy, and super delicious!!

ENJOY!!
:)


DIY Vaseline Distressed Crate

So I've become very "into" the distressed look for some furniture, or decorative pieces.  I think it adds some extra character to a space.  I'm also the type where if something that's NOT distressed, gets scratched or nicked, it drives me crazy :( So hey- if it's distressed- scratches only add more character, and they look like they belong there! Perfect, right!?
So I decided to go ahead and give it a go at creating my own distressed decorative piece.  I looked into the different distressing techniques, and decided to try the vaseline technique, simply because it seemed the most interesting to me! I wanted to see for myself how well it worked, and whether or not I liked how it turned out.  

Needless to say, I loved how it turned out, and it was so simple!!! 

So here's how I did it...

I don't have a very first BEFORE picture (sorry), but it was just a small and simple, light-colored wood crate that I bought from Michaels for maybe $5.  I painted it a dark brown, just with regular, good ol' acrylic paint and a small paint brush! I only used one coat, and it dried super fast. 


Next I just took a dab of vaseline and spread it on the places that I wanted to have the distressed effect.  Wherever you put the vaseline, the top layer of paint WILL NOT stick... so go easy on the vaseline, unless you want a very distressed look, then go at it!! (you can always go back and add more distressing just by sanding away your top layer of paint

Once I was done with the vaseline, I took my top layer of paint, which was a cream (I believe it was actually called "vanilla") and I just did one thicker coat of that color.  (it was also an acrylic paint)

I let the paint dry, and then took an old wash cloth and gently wiped all over the entire crate. Wherever the vaseline was, it wiped away, allowing the dark color to show through, giving me just the distressed look I was going for!

Take a peek at the finished product below!

Rustic Wood Chalkboard DIY

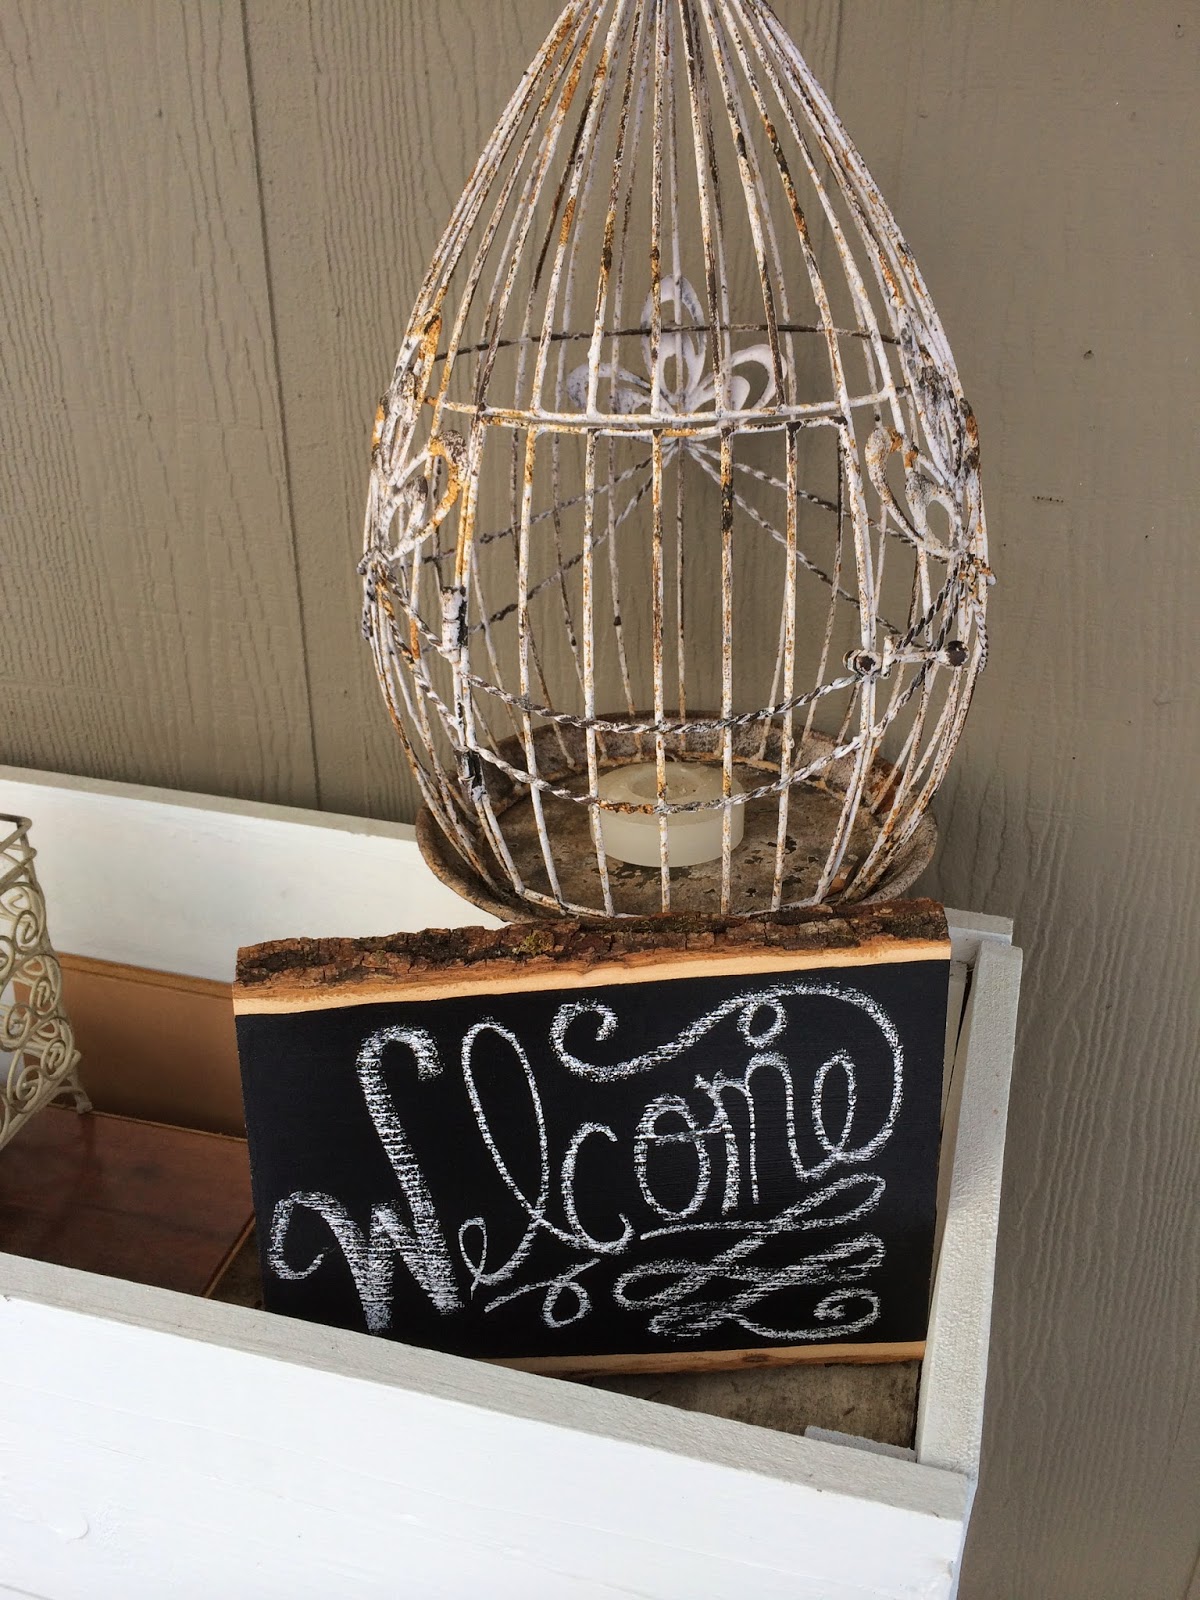
So my love for chalkboards has really grown... Everything I see now, I think "Oh my gosh- that could make an awesome chalkboard!" So yes, I wanted to make a rustic, "outdoorsy" chalkboard for my front porch! Why not, right?!

I bought this plank of wood, which still has really cool bark on the sides (as you can see in the pictures below) from Michaels for only a few dollars. (please ignore the fact that I did this project on an old cardboard box we had.. I don't have a "craft room" yet.. that's down the road for me.. so this box is my "craft box". Kind of sad, I know.
:)


All I did was sand down the top part that I was going to apply the chalkboard paint onto... made it nice and smooth.  I used Martha Stewart chalkboard paint and put on 3 coats of it.  


I let it dry for 24 hours, and voila, there you go! As you can see below, it makes for a nice little welcome sign for my front porch! I might get creative and change it up for holidays, or seasons... we'll see.
:)


Gavin's Monthly Chalkboards (months 3-5)

Gavin's Monthly Chalkboards

Months 3-5

First and foremost I updated my chalk board! (YAYY!) My old one I had just bought from Michaels, and it was nothing fancy- but it got the job done.  For Gavin's monthly pictures I wanted a much cuter chalk board, and I found the perfect one that was made from an old cupboard door! (How cool right?!

I didn't start doing his chalkboards until he was 3 months old.. I guess the first 2 months I just didn't want to use a board? I used the cute little month stickers and that was good enough.  But once he was getting a little older and developing more of a personality, I liked being able to include those things on the boards (especially to be able to track his crazy, insanely fast growth! He was born at 9lbs 11oz and 21 1/2"...  just so you have an idea of how fast he grew on me!!).

So anyway... here are my sweet baby's monthly boards thus far! :)

ENJOY!


(yes, my baby boy is a chunk!!)

Pregnancy Chalkboards

Pregnancy Chalkboards

Pregnant with my little Gavin Man

So as soon as I found out I was pregnant with Gavin, I really wanted to keep track of my weekly belly bump growth! So I started out doing a weekly chalkboard.. which lasted until week17. I actually don't even think I took a picture with any of my chalkboards... but I did manage to at least take a picture of them when I finished them.  Obviously, with my future pregnancies, I plan to be much better about taking pictures WITH my boards...(I do have a belly picture for almost every week of my pregnancy, just minus the board).

I love doing chalkboards- and I've been much better about doing monthly chalkboards with Gavin since he's been born :) Those will be in their own post!  (When Gavin was born I also upgraded my chalkboard... instead of the cheap one I got from Michaels... the one you'll see in these pictures... I bought one that was made out of an old kitchen cupboard door! LOVE IT!)

But here are the boards I managed to do while pregnant with my little man!

ENJOY! :)


Gavin's Room - REMODEL!

Gavin's Room

I'm excited to share this one with you all because it was so much fun! 

So anyone that knows me, knows that I LOVE remodeling rooms. (I usually have about a million ideas on how to change a room..paint that wall this color, that wall that color, put that there, rip up the carpet and put this floor down, put that shelf here...and it goes on like that forever!) So when I found out I was pregnant, I was already planning the nursery! 

Our house was built in the 70's (I think..?Ha!) and it has different trim in pretty much every room, in all the bedrooms had they had pretty nasty (in my opinion) carpets... so room by room I am slowly trying to update our house and make it, project by project, more of a home :) 

So here are the Before pictures of Gavin's room


We found out on March 24th that we were having a little boy! :) That night, this is what his bedroom looked like...

Oh yes.  We came home that night and ripped up that old carpet and tore off all the trim..but saved the trim because I was going to paint it all white!! (I don't waste any time with my projects)
It was really handy having to take all of the trim off to get rid of the carpet and lay down the new floor..I took all the trim, gave it a good sanding, primed it, and painted it all white just using a brush! I did 2-3 coats of white, because the trim was pretty dark! I also painted his side of the door white...same technique as the trim. A real good sanding, a coat or two of primer, and 2-3 coats of the white paint.

I painted the walls what I like to describe as a steel gray/blue.  Originally I wanted it to be slightly more gray, it's a little more blue than I thought, but I love it :) FYI- it's sooooo much nicer to be able to paint BEFORE you put down any new flooring! I didn't have to worry about any wayward drips, or moving around some big, heavy tarp, it was so nice! 

As much as paint will change the look of a room...man does a new floor just totally change the entire feel of a room! We decided to go with a lighter laminate wood floor, that works really well with many different paint colors! We laid the floor on our own, and once you get the hang of it, wow is it easy!
In the picture above is our dog Harley.  He was just as involved in this project as we were.  We like to call him "Furry Human"... because we truly think he believes he is just as human as we are. You will probably see Harley somewhere in the majority of the pictures I post. :)
In the pictures below you get a better feel for the paint color.


 It only took us maybe a day to get the flooring all done....start to finish!

Then it was the fun part- putting all of the pretty white trim back on the walls!!! PS- number your trim (and I even put the corresponding number on the wall where the trim goes, and obviously in a place where the trim would hide the number, once back on the wall). You'd be surprised at how hard it would be to try and remember where each piece of trim went... essentially it would end up like being one big trim puzzle...and you'd end up wasting a lot of your time. 


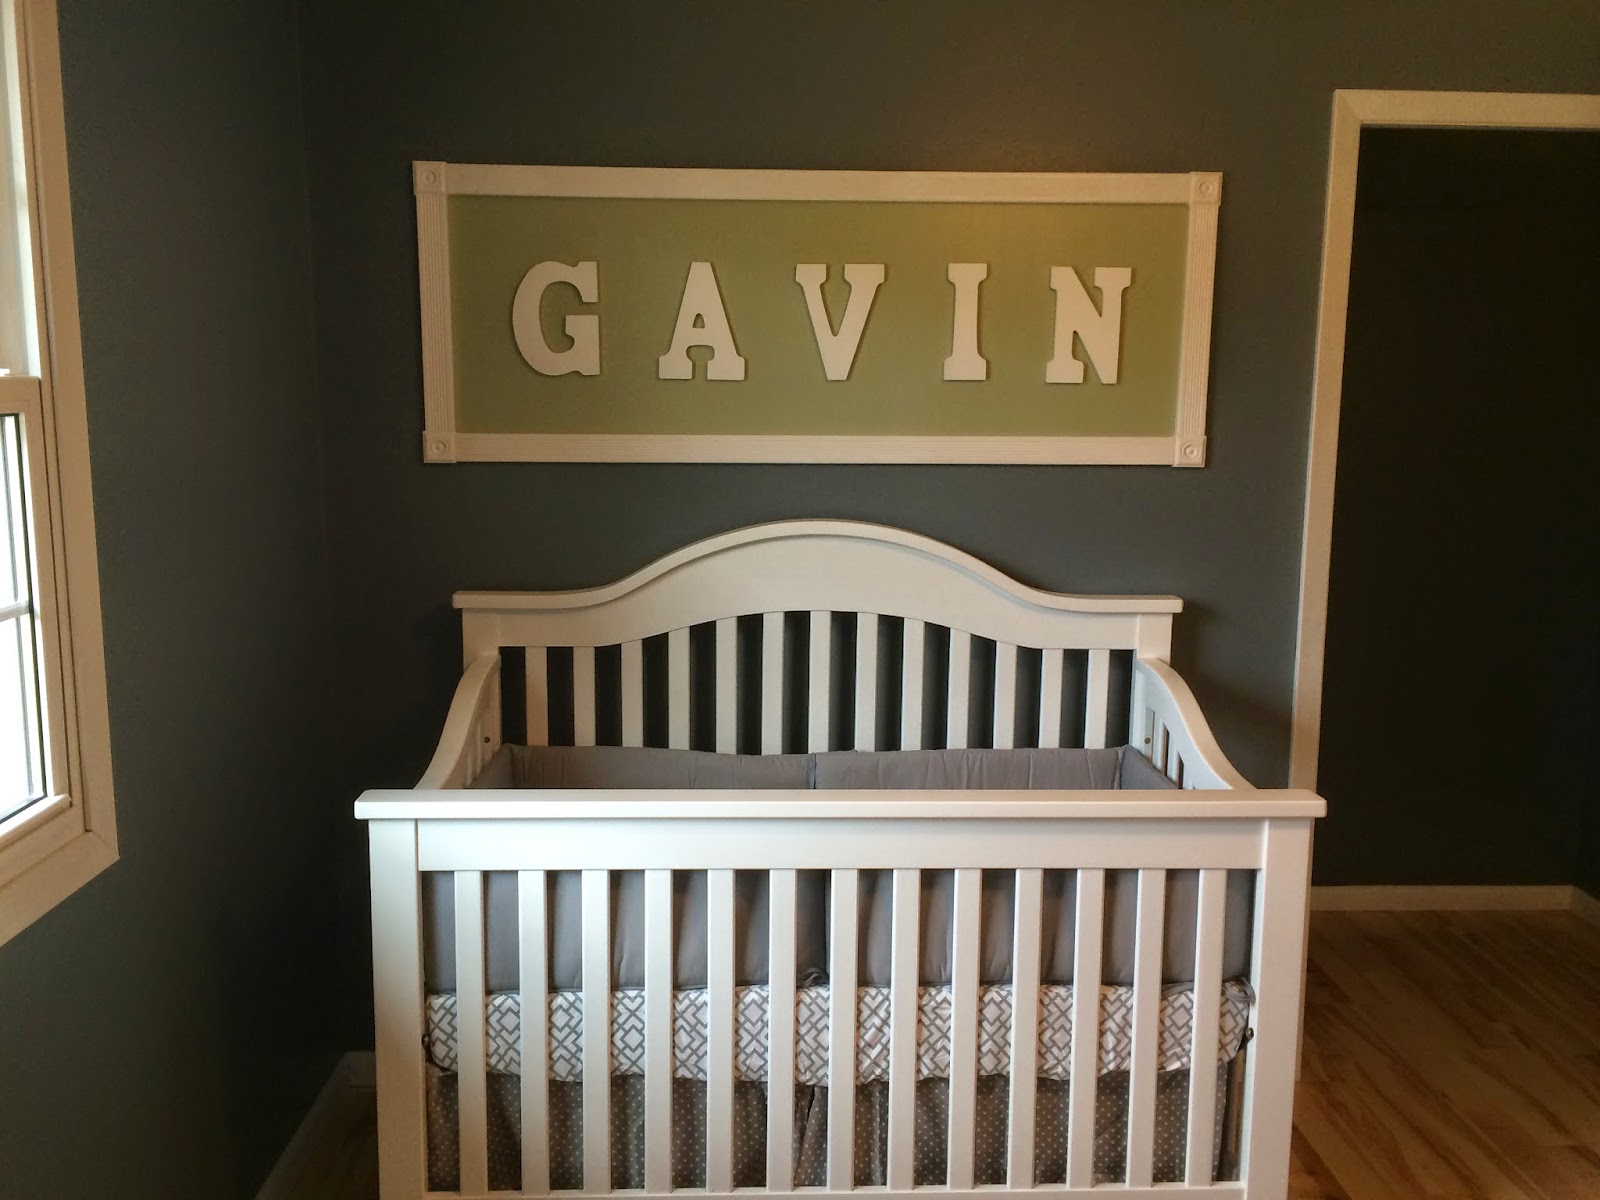
As you can see above, I framed out a rectangle on the wall where I wanted to put his name.  It was actually surprisingly easy. We bought the wood from our local Menards store, and the 4 rosettes from there as well.  I panted them all white to match the trim, and that was that. We did need 3 people (it was Aaron, myself, and my dad) just to be able to get everything level, hold it in place, and use the nail gun. We used an adhesive on the backs of all the wood pieces, then got it in it's place and used the nail gun to nail it all in place.   The letters were the easiest- I got them from Michaels for a couple dollars each (if I remember right) and they were already painted! The finishing touches were just using some white spackle to fill in the nail holes, and there you have it! 

I desperately wanted a wooden rocking chair for Gavin's room.  My mom had a rocking chair that always made the same creaky noises when you rocked in it..and for whatever reason I just wanted a rocking chair that was just like that! (although now that I have one, and it makes the same creaky noise, it kind of drives me crazy..so I may need to fix the creaking, which is pretty simple...) So my husband and I desperately hunted around town for a good old, wooden rocking chair. WOW, we had no idea how hard that was! A- in all of the furniture stores we went to we never saw ONE white, wooden rocking chair..not one!  B- ummmm hello EXPENSIVE!! We did not want to spend $300+ dollars on a rocking chair that we would still have to paint... not to mention spend more on a chair than we spent on our crib! (You will come to notice I love being thrifty) So anyway, we kind of gave up on our rocking chair hunt for awhile.. and I happened to be scrolling through my Facebook news feed... and OH MY GOSH A WHITE WOODEN ROCKING CHAIR at a local thrift store we had in town! I immediately called them and asked if they still had it- and hallelujah- they did! Oh, and the best part.... $25!!!!!! It had a lot of wear and tear, lots of scratches..it needed some TLC.  I was ready to give this thing some new life! I took it outside, sanded it down like crazy, and gave it a few good coats of white spray paint! I did this all in one day! Let it dry for a day or two outside on my parents screened-in porch, and there you have it! A gorgeous, wooden, white rocking chair all for UNDER about $35 dollars! We have spent lots of time rocking our sweet baby boy in this chair.  Best $35 dollars I've ever spent! Take a peek at the transformation of it below.. Top pictures are before.. and bottom pictures are after :)
So as you can see below, there you have it...Gavin's room all said and done. No "theme", I like to just say it's "anything boy". I have some vintage looking decor (a truck, a motorcycle and some other random "boy" things on his shelf..all of which I got from Hobby Lobby).  I chose to leave the closet doors off of his closet... we did keep them just in case in the future we want to put them back up.  For now we really like having them off because it just makes his room feel bigger, and it helps us keep his closet looking neat and organized! ;)


Work In Progress!

Hey Yall! So this blogging thing is brand new to me- I'm still figuring it all out! I PROMISE I am working on some fun posts, and I will get them up as soon as possible! :) 

Post Signature

Post Signature